> For the complete documentation index, see [llms.txt](https://tablion-help.aristotlemetadata.com/llms.txt). Markdown versions of documentation pages are available by appending `.md` to page URLs; this page is available as [Markdown](https://tablion-help.aristotlemetadata.com/administrator-tools/creating-and-managing-custom-email-notification-templates.md).
# Creating and managing custom email notification templates
{% hint style="info" %}
Email notification templates can only be created and managed by an Administrator.
{% endhint %}
Tablion's email notifications work out of a series of templates, one for each valid combination (or 'message type') of an in-system action and a user role (e.g. 'New Comment on Data Request' and 'Approver').
If a custom template is not created for an existing message type, the relevant email notification will follow Tablion's default template.
### How to create and manage custom email notification templates
1. Select 'Admin tools' from your username dropdown.
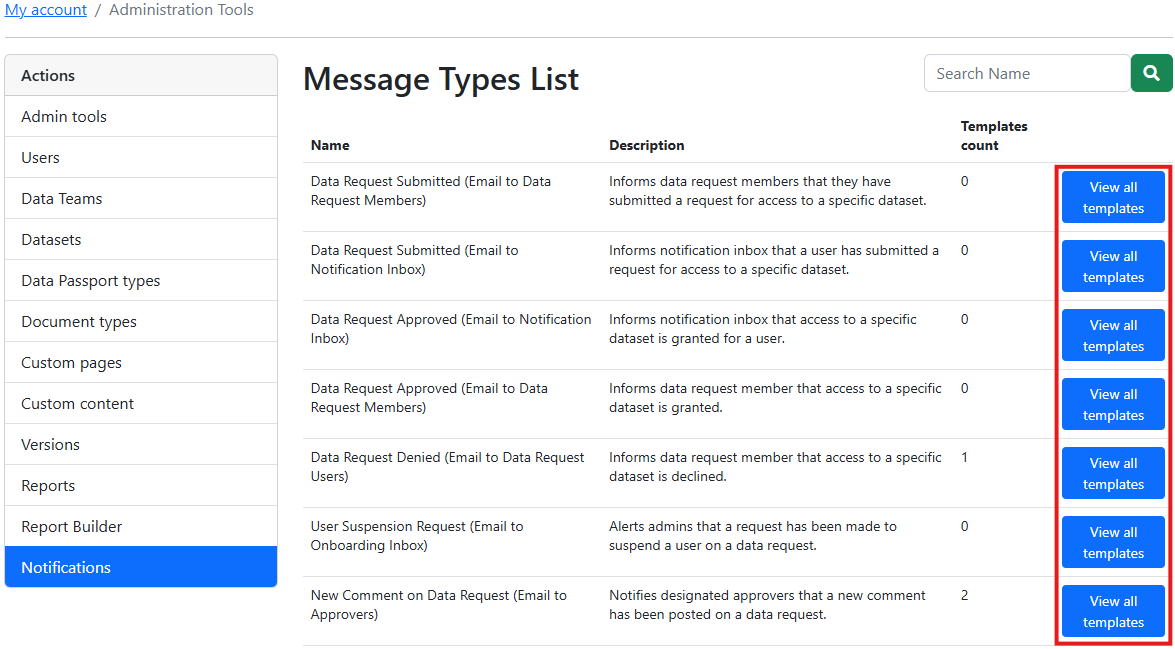
2. Select the 'Notifications' tab.
3. Navigate to the message type that matches the scenario you wish to create or manage a template for and select 'View all templates' from its row.
4. **If you wish to create a new template**, select 'Create'. **If you wish to edit an existing template**, select 'Edit' from the row of the relevant template.
5. Populate the 'Name' field as desired. This will only affect the name of the email notification template in Tablion, and will not influence the actual email notification.
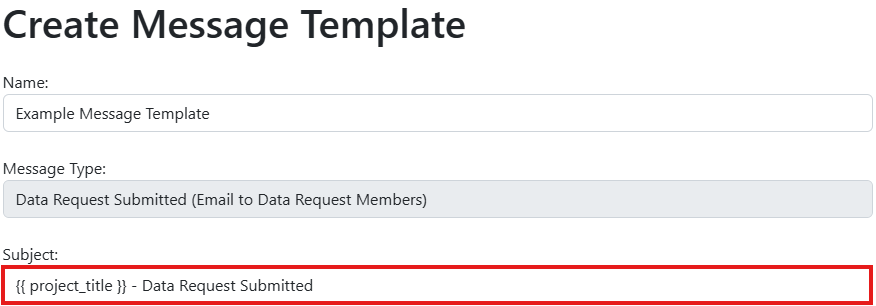
6. Populate the 'Subject' field with the subject you would like the email notification to have.
**Notes:**
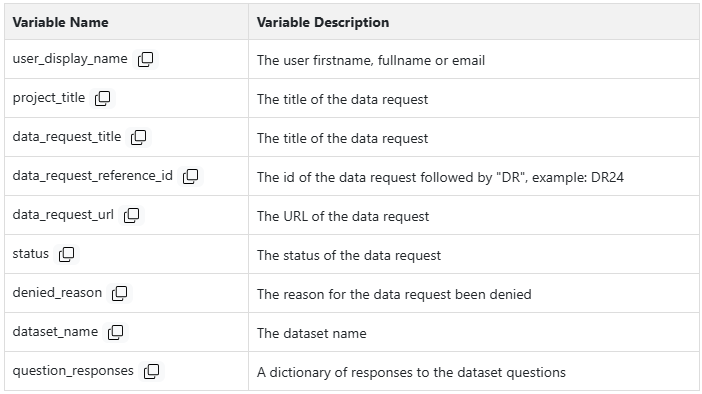
* The subject field is able to make use of **variables**, which are listed at the bottom of the 'Create Message Template' page (below).
* Inserting a variable name in the {{ correct\_format }} (as in the screenshot above) will automatically insert the information the variable represents in the email notification when it is sent to users
* Only the listed variables and those contained in the default notification templates will work for email notifications.
7. **If you wish to write the email's body normally**, delete the contents (if any) of the 'Body HTML' field, and populate the 'Body Plain' field as desired. **If you wish to write the email's body in HTML**, populate the 'Body HTML' field with the desired HTML.
**Note:** These fields are able to make use of **variables**, which are listed at the bottom of the 'Create/Edit Message Template' page. See the notes of step 6 for more information.
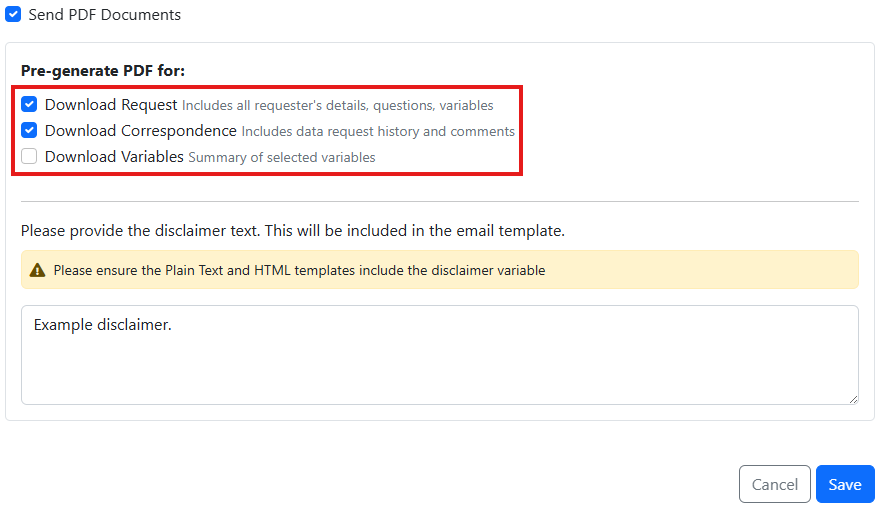
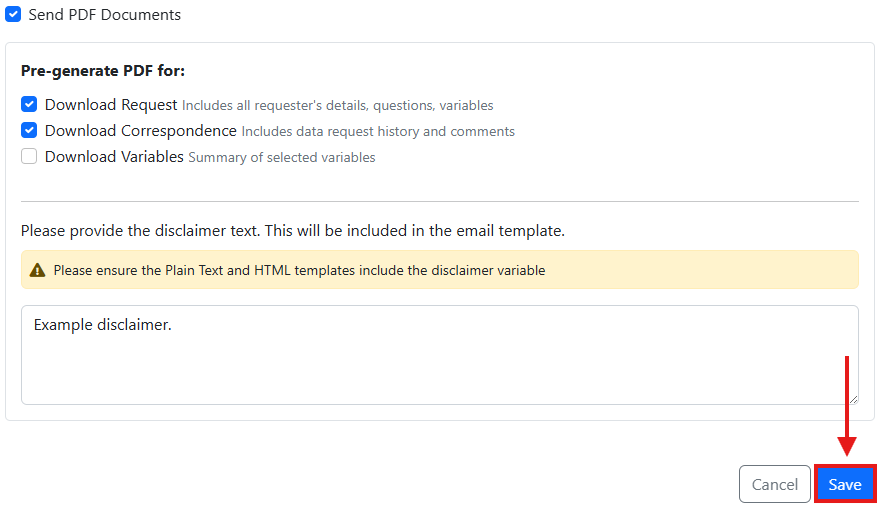
8. **If you wish to have downloadable PDFs attached to this email notification**, select the 'Send PDF Documents' checkbox. **If you do not wish to have downloadable PDFs attached to this email notification**, proceed to step 11.
9. Select the checkboxes of the document types you would like to be attached/downloadable as PDFs.
10. Ensure the disclaimer variable has been used in the 'Body Plain' and 'Body HTML' fields, then populate the 'Enter disclaimer text here...' field with your desired disclaimer.
11. Select 'Save' once satisfied.
12. To activate a notification template, select 'Activate' from its row. Once activated, the template will be used for any emails generated by the relevant message type/trigger.
**Note:** Only one notification template can be activated for each message type at a time.
13. **If you wish to test a notification template**, select 'Test' from its row. An email will be sent to your Administrator email following the relevant template.
14. **If you wish to delete a notification template**, select 'Delete' from its row, then confirm the deletion.